Auto-Reply to Customer Emails
Stop spending hours answering the same questions. With HiveMind OS, incoming customer emails are read by an AI that knows your product — and replies in seconds.
TIP
New to HiveMind OS? Check the Glossary for quick definitions of terms like persona, connector, workflow, and trigger.
What You'll Need
| Item | Details |
|---|---|
| Email connector | Gmail, Microsoft 365, or any IMAP account |
| Product manual | A PDF, Word doc, or text file describing your products or services |
| Time | About 10 minutes |
Step 1: Connect Your Email
A connector links HiveMind OS to an external service — in this case, your email inbox.
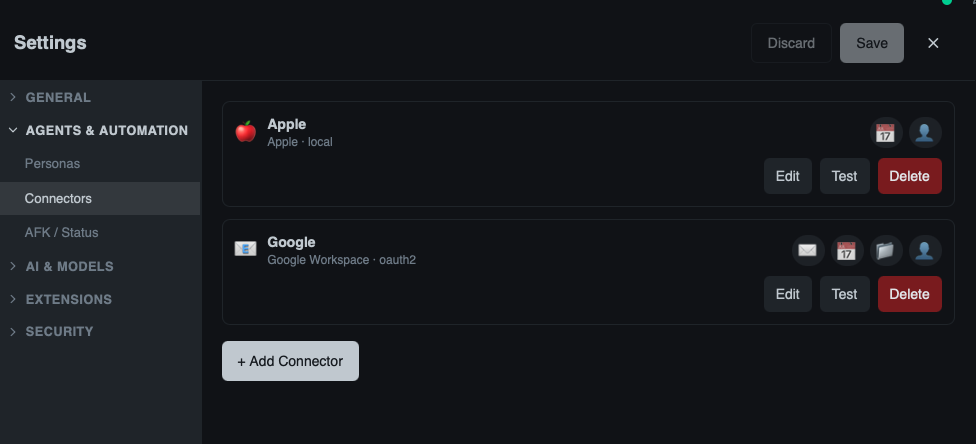
- Click Settings in the sidebar, then click Connectors.
- Click Add Connector.
- Choose your email provider — Gmail, Microsoft 365, or IMAP.
- Follow the on-screen prompts to authorize access. For Gmail and Microsoft 365, you'll sign in with your existing account. For IMAP, enter your server details and credentials.
- Once connected, you'll see a green checkmark next to your email connector.
TIP
You can connect multiple email accounts if you handle support from more than one inbox.
Step 2: Create a Support Persona
A persona tells the AI how to behave. Think of it as hiring a virtual employee and giving them their job description.
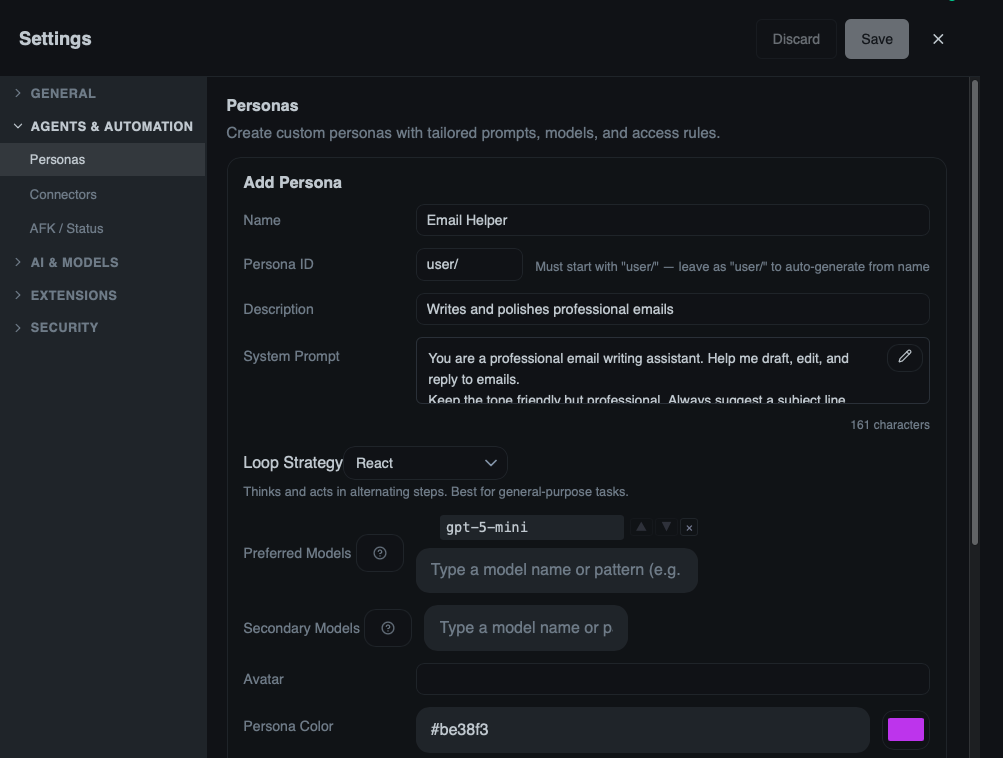
- Click Settings in the sidebar, then click Personas.
- Click New Persona.
- Fill in the fields:
| Field | What to enter |
|---|---|
| Name | Customer Support |
| Description | Answers customer emails using our product knowledge |
| Avatar | Pick 💬 or any emoji you like |
| Color | Choose a color that helps you spot this persona at a glance (e.g., blue) |
- In the System Prompt box, type instructions that tell the AI how to respond. Here's a good starting point:
You are a friendly and helpful customer support agent for our company. When answering customer emails:
- Always check the product manual before answering. If the answer is in the manual, use it.
- Be empathetic and acknowledge the customer's concern before providing a solution.
- Keep replies concise — aim for 3–5 sentences.
- If you're not sure about something, say so honestly and offer to escalate to a human team member.
- Always end with a friendly closing like "Let me know if there's anything else I can help with!"
The system prompt is the most important part — it shapes every reply the AI writes. You can always come back and refine it later.
- Click Save.
Step 3: Create the Workflow
Now you'll connect the pieces: when an email arrives, the AI reads it, checks your manual, and sends a reply. A workflow chains these steps into a repeatable automation.
- Click the ⚙ gear icon next to Workflows in the sidebar to open the workflow definitions view, then click New Workflow.
- Give it a name like
Customer Email Auto-Reply. - Set the mode to Background (this means it runs on its own, without you needing to be there).
Add a Trigger
- In the Triggers section, click Add Trigger.
- Select Incoming Message.
- Choose the email connector you set up in Step 1.
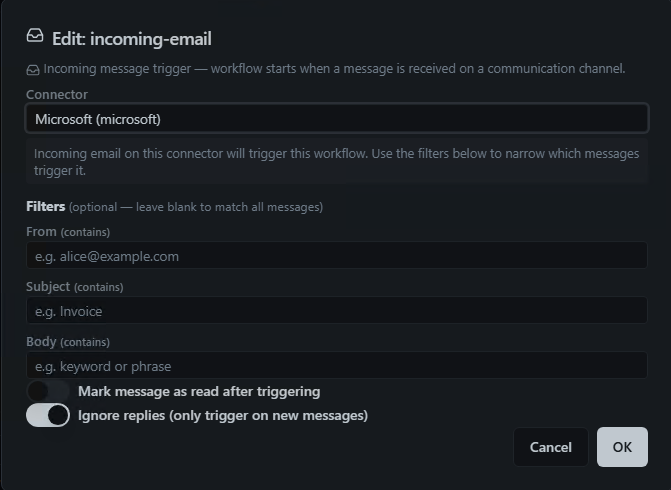
A trigger is the event that starts a workflow — here, it fires every time a new email lands in your inbox.
Add the Step
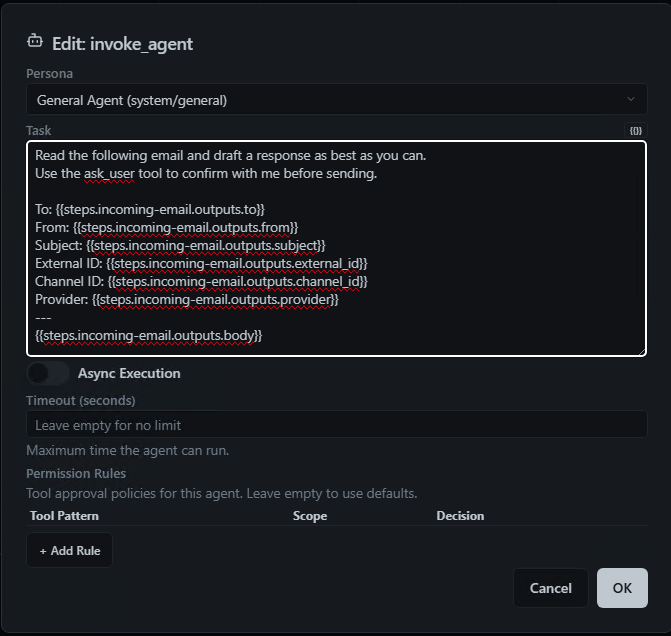
- Click Add Step and choose Invoke Agent.
- Select your Customer Support persona. Make sure your email connector allows this persona — click Settings in the sidebar, then click Connectors, edit the connector, and add the persona to its Allowed Personas list.
- In the instructions, type:
Read the incoming customer email and consult the attached product manual. Draft a helpful reply, then use the ask_user tool to show me the draft and get my approval before sending. Once approved, send the reply to the customer.
Step 4: Upload Your Product Manual
This is what makes the AI actually know your product instead of guessing.
- In the workflow editor, look for the Attachments section (usually at the bottom or in a sidebar panel).
- Click Upload and select your product manual — PDF, Word, or plain text all work.
- You can upload multiple files if your knowledge is spread across different documents (e.g., a product guide, an FAQ sheet, a pricing document).
The AI reads these attachments during every workflow run, so it always has the latest information. When you update your product manual, just swap out the file.
TIP
The more detailed your product manual, the better the AI's answers will be. Include FAQs, troubleshooting steps, pricing info, and common scenarios.
Step 5: Test Before Going Live
Before turning on automatic replies, do a quick test run to make sure everything works.
- Click Save to save your workflow — but leave the trigger disabled for now.
- In the workflow definitions view (click the ⚙ gear icon next to Workflows in the sidebar), find your
Customer Email Auto-Replyworkflow and click the Launch button. - This runs the workflow once manually. Follow the launch wizard: select the trigger, fill in any inputs, review, and click Launch.
- Click Workflows in the sidebar (not the gear icon) to see running and completed instances. Check the result to make sure the AI drafted a sensible reply.
- Once you're satisfied, go back to the workflow definition and toggle the trigger to Enabled for automatic runs.
Step 6: Activate
Once your test looks good:
- Click the ⚙ gear icon next to Workflows in the sidebar to return to the definitions view.
- Open your
Customer Email Auto-Replyworkflow. - Toggle the workflow to Enabled.
That's it! From now on, every incoming email will be read and answered by the AI. Because the prompt uses ask_user, you'll be asked to approve each reply before it goes out. Once you're confident in the quality, you can remove that part of the prompt to let the AI send replies fully autonomously.
Tips for Success
Handle Different Email Types
Not every email needs an auto-reply. Consider refining the prompt to handle different cases:
- Product questions → auto-reply using the manual
- Billing issues → forward to your billing team
- Complaints → flag for personal follow-up
When the AI Gets It Wrong
It will happen — and that's okay. When you spot an incorrect reply:
- Click Settings in the sidebar, then click Personas, and refine the system prompt with more specific instructions.
- Update your product manual with the missing information.
- The next reply will be better. The AI learns from the documents you give it, so better docs mean better answers.
Related
- Daily Briefing — Get a morning summary of everything that needs your attention
- Connectors Guide — Detailed setup for all supported email and chat providers
- Personas Guide — Deep dive into creating and managing personas
- Workflows Guide — Learn more about triggers, steps, and the visual designer